
Introduction
The previous tutorial, Deploying a HA Harbor Registry on DigitalOcean Kubernetes covers the use of a Terraform module to automate the installation of a high availability (HA) Harbor Registry on a DigitalOcean Kubernetes cluster. By default the module exposes Harbor via a Cluster IP.
What this tutorial covers?
This tutorial builds on the previous one by combining the Harbor module with a simple Traefik module. The Traefik module deploys a Traefik Ingress Controller with a valid TLS certificate to proxy external requests for Harbor. Global HTTPS redirection is also configured.
Why Traefik?
There are many ingress controllers capable of proxying external traffic for Harbor. With it’s extensible nature (through middlewares) and wealth of configuration examples Traefik is one of my favourites.
Prerequisites
For this guide you’ll need the following:
- DigitalOcean Cloud Account (Referral Link) & Personal Access Token (with Read/Write permissions)
- Spaces Access Keys
- A Pre-provisioned DigitalOcean Kubernetes Cluster (DOKS) [version ≥ 1.10]
- A valid TLS certificate secret for your chosen domain name.
- Terraform ≥ v0.15
- Beginner to intermediate knowledge of Terraform, Kubernetes & Traefik
Deployment Options
Traefik can be configured to proxy requests for Harbor in a number of ways. All of which offer TLS termination with a valid certificate and HTTPS redirection. However, not all support high availability (HA).
❌ Traefik with Let’s Encrypt: Traefik offers built-in Let’s Encrypt support. Unfortunately, it’s not possible to run multiple instances of Traefik 2.0 with Let’s Encrypt enabled1. The focus of the previous tutorial was high availability. So (although functional) running Traefik as a sole instance just to accommodate Let’s Encrypt would introduce a single point of failure, thus compromising the high availability of the Harbor deployment.
✔️ Harbor Ingress configuration (with cert-manager): I chose cert-manager to generate the TLS certificate secret that Harbor’s Ingress configuration references. Although you can create and import the TLS secret manually, cert-manager supports high availability, auto-renewal and is overall a much better method of managing certificates.
✔️ Traefik IngressRoute (CRD) (with cert-manager): Traefik can be configured to ignore (not process) the default ingress (setting
var.harbor_expose_typeto"ingress") and instead use IngressRoute (Traefik’s Custom Resource Definitions) to route requests. Again, cert-manager carries out the role of generating a TLS certificate.
❌: No HA support, ✔️: HA support.
Create Harbor Namespace & Generate a TLS Certificate
Before deploying Harbor ensure that following preparations have been made:
- A
harbornamespace has been created.kubectl create ns harbor - A certificate secret exists in the harbor namespace that’s valid for both:
harbor.[yourdomain.com]notary.[yourdomain.com]
Option 1 - Configure Harbor Ingress for Traefik
As previously mentioned this option combines the Harbor module with a Traefik module. Harbor’s Ingress configuration is customised to utilise the Traefik Ingress Controller.
1. Clone the Example Repository and navigate to the traefik_ingress directory.
git clone -b terraform-digitalocean-doks-harbor https://github.com/colinwilson/example-terraform-modules
example-terraform-modules/
|-- existing_doks_cluster/
|-- new_doks_cluster/
`-- traefik_ingress/
    |-- .gitignore
    |-- README.md
    |-- main.tf
    |-- terraform.tfvars.example
    |-- traefik_ingress_values.yaml
    |-- traefik_ingressroute_values.yaml
    `-- variables.tf
2. Rename the terraform.tfvars.example file to terraform.tfvars and substitute the variables with values relevant to your deployment.
# terraform.tfvars
# Remove the `example` extension & Replace example values with your own

# DigitalOcean API Keys
do_token          = "5d9db880850bde7e1ced8e5..."
spaces_access_id  = "327PRAJ5V..."
spaces_secret_key = "jSbdU4W0X1seeqE4TCR..."

# Name of the DOKS cluster to install Harbor on
doks_cluster_name = "dev-cluster"

# The domain to append to the `harbor` subdomain
harbor_ext_url                = "yourdomain.com"

harbor_expose_type            = "traefik"

# Name of the TLS secret for 'harbor.yourdoamin.com' & 'notary.yourdomain.com'
harbor_tls_secret_name        = "harbor-yourdomain-com-live"
harbor_tls_notary_secret_name = "harbor-yourdomain-com-live"

# Name of the custom Traefik configuration file
traefik_values_file = "traefik_ingress_values.yaml"
3. Initialise the module (terraform init) and then run apply (terraform apply). Once all the resources are provisioned (it can take a while) and Harbor and Traefik have been deployed, open the DigitalOcean console and retrieve the IP address of the provisioned Cloud Load Balancer:
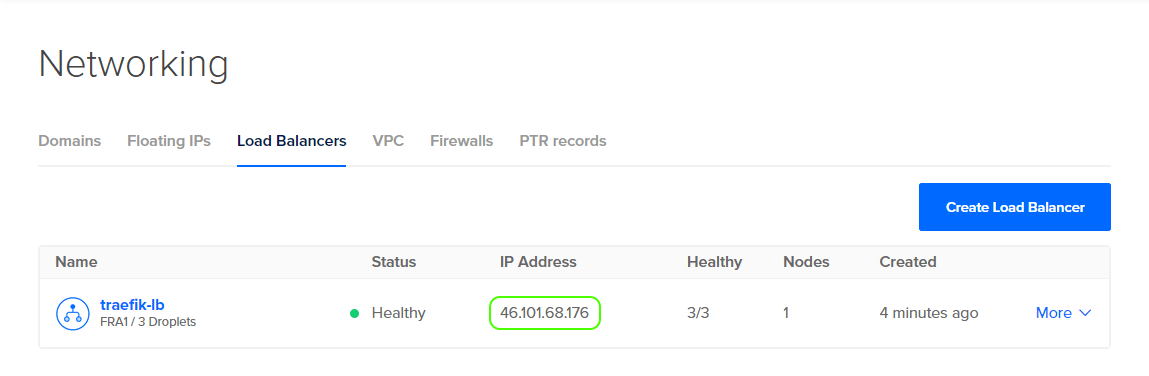
For both your domains (harbor.[yourdomain.com] and notary.[yourdomain.com]), you can either set a couple of DNS records that point to the cloud load balancer’s IP or you can edit your local hosts file to do the same.
4. Now open your browser and navigate to https://harbor.[yourdomain.com]. You should be presented with Harbor’s portal page:

If you wish to view the configured Ingress routes via Traefik’s dashboard, open a console and forward the dashboard locally using the following command:
kubectl port-forward -n traefik $(kubectl get pods -n traefik --selector=app.kubernetes.io/name=traefik --output=name) 9000:9000
Now open a browser and navigate to http://localhost:9000/dashboard/.Click on ‘🌐 HTTP’ in the top most menu. All routes auto-discovered by Traefik are now displayed:

Option 2 - Configure a Traefik IngressRoute for Harbor
Alternatively an IngressRoute can be configured to proxy Harbor requests. This can be achieved with minimal changes to the configuration outlined in Option 1.
1. After cloning the example repository (as in part 1 of Option 1), configure the terraform.tfvars file the same except for the following two variables:
....

harbor_expose_type = "ingress"

....

# Name of the custom Traefik configuration file
traefik_values_file = "traefik_ingressroute_values.yaml"
Setting harbor_expose_type to ingress will deploy Harbor with the default ingress (not customised for Traefik). And the traefik_ingressroute_values.yaml file instructs Traefik to ignore Harbor’s default ingress via a label-selector.
2. Create an ingressRoute file (e.g. harbor_traefik_ingressroute.yaml) with the following contents, substituting the square bracketed [] values for your own:
apiVersion: traefik.containo.us/v1alpha1
kind: IngressRoute
metadata:
  name: [harbor-yourdomain-com]
  namespace: harbor
spec:
  entryPoints:
    - websecure
  routes:
  - match: Host(`harbor.[yourdomain.com]`)
    kind: Rule
    services:
    - name: harbor-portal
      port: 80
  - match: Host(`harbor.[yourdomain.com]`) && PathPrefix(`/api/`, `/c/`, `/chartrepo/`, `/service/`, `/v2/`)
    kind: Rule
    services:
    - name: harbor-core
      port: 80
  - match: Host(`notary.[yourdomain.com]`)
    kind: Rule
    services:
    - name: harbor-notary-server
      port: 4443
  tls:
    secretName: [harbor-yourdomain-com-live]
Apply the IngressRoute using the following command:
kubectl apply -f harbor_traefik_ingressroute.yaml
3. You can now follow part 3 and 4 from Option 1 to finish up and access Harbor’s portal. If you again view Harbor’s routes via the Traefik dashboard you’ll see that they’re the same except Harbor’s PathPrefix paths have been consolidated under a single rule (something you may have already noticed from the ingressRoute configuration file):

Summary
You’ve now have an externally accessible Harbor Registry. Unlike the previous tutorial there’s no need to configure your Docker daemon with a CA certificate to login or push images since a valid certificate signed by a trusted authority (Let’s Encrypt) has been configured.