Introduction
The deployment of a private container registry inside Kubernetes has been on my to-do list for a while now. DigitalOcean’s 2021 Kubernetes Challenge presented the perfect opportunity to explore this task using the popular open source registry Harbor.
Why Harbor?
Private container registries like Harbor offer many advantages over public ones (such as Docker Hub), especially for developers and/or organisations running applications (or multiple apps) at scale.
Some of Harbor’s benefits include:
- Security and vulnerability analysis of images
- Mitigating the impact of Docker Hub rate limits
- Identity integration and roles-based access control
- An extensible API and web UI
- Replication across many registries, including Harbor
Harbor is also an official Cloud Native Computing Foundation (CNCF) project. Along with strong community engagement makes Harbor a solid private registry choice.
What does this tutorial cover?
This guide covers the use of Terraform to automate and streamline the process of deploying a highly available Harbor registry on a DigitalOcean (DO) Kubernetes cluster.
Prerequisites
Before you begin this guide you’ll need the following:
- DigitalOcean Cloud Account (Referral Link) & Personal Access Token (with Read/Write permissions)
- Spaces Access Keys
- A Pre-provisioned DigitalOcean Kubernetes Cluster (DOKS) [version ≥ 1.10].
- Terraform ≥ v0.15
- Beginner to intermediate knowledge of Kubernetes & Terraform
Deployment Plan
Architecture
The architecture for this high availability deployment has Harbor’s stateless components deployed as replicas pods on a K8s cluster. The storage layer (PostgreSQL, Redis & Object Storage) is provisioned as managed resources external to the cluster but in the same region and VPC network.
It is possible to deploy Postgres & Redis (via Helm Charts) on the same DOKS cluster as Harbor. However, since DigitalOcean offers both in the form of managed services, the high availability of the storage and caching layer can be further abstracted outside the cluster and avoid the complexities that come with managing high availability databases on Kubernetes.
Additionally, a cloud load balancer and ingress controller can be deployed to enable external access to the registry. See the next tutorial for details on how to achieve this.

Automation
The Terraform module will automate the provisioning of Harbor’s requisite resources on DigitalOcean’s platform.
This includes the following:
- A Managed PostgreSQL & Redis Cluster
- A Cloud Firewall for the above databases (optional)
- Creation of the empty databases Harbor requires
- A dedicated Spaces bucket for Harbor
Once these resources are provisioned, the module will deploy Harbor on the cluster.
The module does not install an ingress controller. However, you can combine this module with one that installs your ingress controller of choice (e.g. Traefik) to enable external access to Harbor. This scenario is covered in the next tutorial.
Step 1 - Clone the Example Repository
Clone the example Terraform configuration repository https://github.com/colinwilson/example-terraform-modules/tree/terraform-digitalocean-doks-harbor
git clone -b terraform-digitalocean-doks-harbor https://github.com/colinwilson/example-terraform-modules
example-terraform-modules/
|-- existing_doks_cluster/
|   |-- .gitignore
|   |-- README.md
|   |-- main.tf
|   |-- outputs.tf
|   |-- terraform.tfvars
|   `-- variables.tf
|-- new_doks_cluster/
`-- traefik_ingress/
Switch to the existing_doks_cluster directory.
Step 2 - Set the Required Input Variables
The module’s default configuration requires only four inputs. Substitute the dummy values in the terraform.tfvars file with your DigitalOcean Personal Access Token, Spaces Access ID & Secret Key and the name of your DOKS cluster:
# terraform.tfvars (example)

# Your DigitalOcean Personal Access Token (Read & Write)
do_token = "7f5ef8eb151e3c81cd893c6...."

# Your DigitaOcean Spaces Access ID & Secret Key
spaces_access_id  = "JKNSWH6PJWAQ...."
spaces_secret_key = "6IDwenoZcDFPa01KMHFrPED0bnMjx...."

# The name of your existing DOKS cluster
doks_cluster_name = "my_cluster"
Step 3 - Initialize the Terraform Configuration & Provision Harbor and its Resources
Still in the example-terraform-modules/existing_doks_cluster directory, run terraform init to initialize your configuration.
terraform init
Terraform will proceed to download the required provider plugins.
Example 'terraform init' OUTPUT. (click to expand)
Initializing modules...

Initializing the backend...

Initializing provider plugins...
- Finding latest version of hashicorp/kubernetes...
- Finding latest version of hashicorp/helm...
- Finding latest version of hashicorp/random...
- Finding latest version of digitalocean/digitalocean...
- Installing hashicorp/kubernetes v2.7.1...
- Installed hashicorp/kubernetes v2.7.1 (signed by HashiCorp)
- Installing hashicorp/helm v2.4.1...
- Installed hashicorp/helm v2.4.1 (signed by HashiCorp)
- Installing hashicorp/random v3.1.0...
- Installed hashicorp/random v3.1.0 (signed by HashiCorp)
- Installing digitalocean/digitalocean v2.16.0...
- Installed digitalocean/digitalocean v2.16.0 (signed by a HashiCorp partner, key ID F82037E524B9C0E8)

...

Terraform has been successfully initialized!
Now run terraform apply to apply your configuration and deploy the Harbor registry.
terraform apply
Respond to the prompt with yes to apply the changes and begin provisioning all resources.
Example 'terraform apply' OUTPUT. (click to expand)
Terraform used the selected providers to generate the following execution plan. Resource actions are indicated with the
following symbols:
+ create
Terraform will perform the following actions:
# module.harbor.digitalocean_database_cluster.harbor_postgres will be created
+ resource "digitalocean_database_cluster" "harbor_postgres" {
+ database = (known after apply)
+ engine = "pg"
+ host = (known after apply)
+ id = (known after apply)
+ name = "harbor-postgres"
+ node_count = 1
+ password = (sensitive value)
+ port = (known after apply)
+ private_host = (known after apply)
+ private_network_uuid = "41567c0a-8795-471d-8834-82290be25fec"
+ private_uri = (sensitive value)
+ region = "fra1"
+ size = "db-s-1vcpu-1gb"
+ uri = (sensitive value)
+ urn = (known after apply)
+ user = (known after apply)
+ version = "13"
}
# module.harbor.digitalocean_database_cluster.harbor_redis will be created
+ resource "digitalocean_database_cluster" "harbor_redis" {
+ database = (known after apply)
+ engine = "redis"
+ host = (known after apply)
+ id = (known after apply)
+ name = "harbor-redis"
+ node_count = 1
+ password = (sensitive value)
+ port = (known after apply)
+ private_host = (known after apply)
+ private_network_uuid = "41567c0a-8795-471d-8834-82290be25fec"
+ private_uri = (sensitive value)
+ region = "fra1"
+ size = "db-s-1vcpu-1gb"
+ uri = (sensitive value)
+ urn = (known after apply)
+ user = (known after apply)
+ version = "6"
}
# module.harbor.digitalocean_database_db.harbor_notaryserver will be created
+ resource "digitalocean_database_db" "harbor_notaryserver" {
+ cluster_id = (known after apply)
+ id = (known after apply)
+ name = "notary_server"
}
# module.harbor.digitalocean_database_db.harbor_notarysigner will be created
+ resource "digitalocean_database_db" "harbor_notarysigner" {
+ cluster_id = (known after apply)
+ id = (known after apply)
+ name = "notary_signer"
}
# module.harbor.digitalocean_database_db.harbor_registry will be created
+ resource "digitalocean_database_db" "harbor_registry" {
+ cluster_id = (known after apply)
+ id = (known after apply)
+ name = "registry"
}
# module.harbor.digitalocean_database_firewall.harbor_postgres[0] will be created
+ resource "digitalocean_database_firewall" "harbor_postgres" {
+ cluster_id = (known after apply)
+ id = (known after apply)
+ rule {
+ created_at = (known after apply)
+ type = "k8s"
+ uuid = (known after apply)
+ value = "e1062221-c11e-4edf-a1c5-6f97e6c69c96"
}
}
# module.harbor.digitalocean_database_firewall.harbor_redis[0] will be created
+ resource "digitalocean_database_firewall" "harbor_redis" {
+ cluster_id = (known after apply)
+ id = (known after apply)
+ rule {
+ created_at = (known after apply)
+ type = "k8s"
+ uuid = (known after apply)
+ value = "e1062221-c11e-4edf-a1c5-6f97e6c69c96"
}
}
# module.harbor.digitalocean_database_user.harbor will be created
+ resource "digitalocean_database_user" "harbor" {
+ cluster_id = (known after apply)
+ id = (known after apply)
+ name = "harbor"
+ password = (sensitive value)
+ role = (known after apply)
}
# module.harbor.digitalocean_spaces_bucket.harbor will be created
+ resource "digitalocean_spaces_bucket" "harbor" {
+ acl = "private"
+ bucket_domain_name = (known after apply)
+ force_destroy = false
+ id = (known after apply)
+ name = (known after apply)
+ region = "fra1"
+ urn = (known after apply)
}
# module.harbor.helm_release.harbor will be created
+ resource "helm_release" "harbor" {
+ atomic = false
+ chart = "harbor"
+ cleanup_on_fail = false
+ create_namespace = false
+ dependency_update = false
+ disable_crd_hooks = false
+ disable_openapi_validation = false
+ disable_webhooks = false
+ force_update = false
+ id = (known after apply)
+ lint = false
+ manifest = (known after apply)
+ max_history = 0
+ metadata = (known after apply)
+ name = "harbor"
+ namespace = "harbor"
+ recreate_pods = false
+ render_subchart_notes = true
+ replace = false
+ repository = "https://helm.goharbor.io"
+ reset_values = false
+ reuse_values = false
+ skip_crds = false
+ status = "deployed"
+ timeout = 300
+ values = (known after apply)
+ verify = false
+ version = "1.8.1"
+ wait = true
+ wait_for_jobs = false
}
# module.harbor.kubernetes_daemonset.redis_proxy will be created
+ resource "kubernetes_daemonset" "redis_proxy" {
+ id = (known after apply)
+ wait_for_rollout = true
+ metadata {
+ generation = (known after apply)
+ labels = {
+ "app" = "redis-proxy"
}
+ name = "redis-proxy"
+ namespace = "harbor"
+ resource_version = (known after apply)
+ uid = (known after apply)
}
+ spec {
+ min_ready_seconds = 0
+ revision_history_limit = 10
+ selector {
+ match_labels = {
+ "app" = "redis-proxy"
}
}
+ strategy {
+ type = (known after apply)
+ rolling_update {
+ max_unavailable = (known after apply)
}
}
+ template {
+ metadata {
+ generation = (known after apply)
+ labels = {
+ "app" = "redis-proxy"
}
+ name = (known after apply)
+ resource_version = (known after apply)
+ uid = (known after apply)
}
+ spec {
+ automount_service_account_token = true
+ dns_policy = "ClusterFirst"
+ enable_service_links = true
+ host_ipc = false
+ host_network = false
+ host_pid = false
+ hostname = (known after apply)
+ node_name = (known after apply)
+ restart_policy = "Always"
+ service_account_name = (known after apply)
+ share_process_namespace = false
+ termination_grace_period_seconds = 30
+ container {
+ args = (known after apply)
+ image = "aigis/socat:1.7.4.2-r0"
+ image_pull_policy = (known after apply)
+ name = "redis-proxy"
+ stdin = false
+ stdin_once = false
+ termination_message_path = "/dev/termination-log"
+ termination_message_policy = (known after apply)
+ tty = false
+ port {
+ container_port = 6379
+ name = "redis"
+ protocol = "TCP"
}
+ resources {
+ limits = {
+ "cpu" = "0.5"
+ "memory" = "100Mi"
}
+ requests = {
+ "cpu" = "50m"
+ "memory" = "50Mi"
}
}
}
+ image_pull_secrets {
+ name = (known after apply)
}
+ readiness_gate {
+ condition_type = (known after apply)
}
+ volume {
+ name = (known after apply)
+ aws_elastic_block_store {
+ fs_type = (known after apply)
+ partition = (known after apply)
+ read_only = (known after apply)
+ volume_id = (known after apply)
}
+ azure_disk {
+ caching_mode = (known after apply)
+ data_disk_uri = (known after apply)
+ disk_name = (known after apply)
+ fs_type = (known after apply)
+ kind = (known after apply)
+ read_only = (known after apply)
}
+ azure_file {
+ read_only = (known after apply)
+ secret_name = (known after apply)
+ secret_namespace = (known after apply)
+ share_name = (known after apply)
}
+ ceph_fs {
+ monitors = (known after apply)
+ path = (known after apply)
+ read_only = (known after apply)
+ secret_file = (known after apply)
+ user = (known after apply)
+ secret_ref {
+ name = (known after apply)
+ namespace = (known after apply)
}
}
+ cinder {
+ fs_type = (known after apply)
+ read_only = (known after apply)
+ volume_id = (known after apply)
}
+ config_map {
+ default_mode = (known after apply)
+ name = (known after apply)
+ optional = (known after apply)
+ items {
+ key = (known after apply)
+ mode = (known after apply)
+ path = (known after apply)
}
}
+ csi {
+ driver = (known after apply)
+ fs_type = (known after apply)
+ read_only = (known after apply)
+ volume_attributes = (known after apply)
+ volume_handle = (known after apply)
+ controller_expand_secret_ref {
+ name = (known after apply)
+ namespace = (known after apply)
}
+ controller_publish_secret_ref {
+ name = (known after apply)
+ namespace = (known after apply)
}
+ node_publish_secret_ref {
+ name = (known after apply)
+ namespace = (known after apply)
}
+ node_stage_secret_ref {
+ name = (known after apply)
+ namespace = (known after apply)
}
}
+ downward_api {
+ default_mode = (known after apply)
+ items {
+ mode = (known after apply)
+ path = (known after apply)
+ field_ref {
+ api_version = (known after apply)
+ field_path = (known after apply)
}
+ resource_field_ref {
+ container_name = (known after apply)
+ divisor = (known after apply)
+ resource = (known after apply)
}
}
}
+ empty_dir {
+ medium = (known after apply)
+ size_limit = (known after apply)
}
+ fc {
+ fs_type = (known after apply)
+ lun = (known after apply)
+ read_only = (known after apply)
+ target_ww_ns = (known after apply)
}
+ flex_volume {
+ driver = (known after apply)
+ fs_type = (known after apply)
+ options = (known after apply)
+ read_only = (known after apply)
+ secret_ref {
+ name = (known after apply)
+ namespace = (known after apply)
}
}
+ flocker {
+ dataset_name = (known after apply)
+ dataset_uuid = (known after apply)
}
+ gce_persistent_disk {
+ fs_type = (known after apply)
+ partition = (known after apply)
+ pd_name = (known after apply)
+ read_only = (known after apply)
}
+ git_repo {
+ directory = (known after apply)
+ repository = (known after apply)
+ revision = (known after apply)
}
+ glusterfs {
+ endpoints_name = (known after apply)
+ path = (known after apply)
+ read_only = (known after apply)
}
+ host_path {
+ path = (known after apply)
+ type = (known after apply)
}
+ iscsi {
+ fs_type = (known after apply)
+ iqn = (known after apply)
+ iscsi_interface = (known after apply)
+ lun = (known after apply)
+ read_only = (known after apply)
+ target_portal = (known after apply)
}
+ local {
+ path = (known after apply)
}
+ nfs {
+ path = (known after apply)
+ read_only = (known after apply)
+ server = (known after apply)
}
+ persistent_volume_claim {
+ claim_name = (known after apply)
+ read_only = (known after apply)
}
+ photon_persistent_disk {
+ fs_type = (known after apply)
+ pd_id = (known after apply)
}
+ projected {
+ default_mode = (known after apply)
+ sources {
+ config_map {
+ name = (known after apply)
+ optional = (known after apply)
+ items {
+ key = (known after apply)
+ mode = (known after apply)
+ path = (known after apply)
}
}
+ downward_api {
+ items {
+ mode = (known after apply)
+ path = (known after apply)
+ field_ref {
+ api_version = (known after apply)
+ field_path = (known after apply)
}
+ resource_field_ref {
+ container_name = (known after apply)
+ divisor = (known after apply)
+ resource = (known after apply)
}
}
}
+ secret {
+ name = (known after apply)
+ optional = (known after apply)
+ items {
+ key = (known after apply)
+ mode = (known after apply)
+ path = (known after apply)
}
}
+ service_account_token {
+ audience = (known after apply)
+ expiration_seconds = (known after apply)
+ path = (known after apply)
}
}
}
+ quobyte {
+ group = (known after apply)
+ read_only = (known after apply)
+ registry = (known after apply)
+ user = (known after apply)
+ volume = (known after apply)
}
+ rbd {
+ ceph_monitors = (known after apply)
+ fs_type = (known after apply)
+ keyring = (known after apply)
+ rados_user = (known after apply)
+ rbd_image = (known after apply)
+ rbd_pool = (known after apply)
+ read_only = (known after apply)
+ secret_ref {
+ name = (known after apply)
+ namespace = (known after apply)
}
}
+ secret {
+ default_mode = (known after apply)
+ optional = (known after apply)
+ secret_name = (known after apply)
+ items {
+ key = (known after apply)
+ mode = (known after apply)
+ path = (known after apply)
}
}
+ vsphere_volume {
+ fs_type = (known after apply)
+ volume_path = (known after apply)
}
}
}
}
}
}
# module.harbor.kubernetes_namespace.harbor will be created
+ resource "kubernetes_namespace" "harbor" {
+ id = (known after apply)
+ metadata {
+ generation = (known after apply)
+ name = "harbor"
+ resource_version = (known after apply)
+ uid = (known after apply)
}
}
# module.harbor.kubernetes_service.redis_proxy will be created
+ resource "kubernetes_service" "redis_proxy" {
+ id = (known after apply)
+ status = (known after apply)
+ wait_for_load_balancer = true
+ metadata {
+ generation = (known after apply)
+ labels = {
+ "app" = "redis-proxy"
}
+ name = "redis-proxy"
+ namespace = "harbor"
+ resource_version = (known after apply)
+ uid = (known after apply)
}
+ spec {
+ cluster_ip = (known after apply)
+ external_traffic_policy = (known after apply)
+ health_check_node_port = (known after apply)
+ publish_not_ready_addresses = false
+ selector = {
+ "app" = "redis-proxy"
}
+ session_affinity = "ClientIP"
+ type = "ClusterIP"
+ port {
+ node_port = (known after apply)
+ port = 6379
+ protocol = "TCP"
+ target_port = "6379"
}
}
}
# module.harbor.random_id.spaces_bucket_id will be created
+ resource "random_id" "spaces_bucket_id" {
+ b64_std = (known after apply)
+ b64_url = (known after apply)
+ byte_length = 4
+ dec = (known after apply)
+ hex = (known after apply)
+ id = (known after apply)
}
Plan: 14 to add, 0 to change, 0 to destroy.
Do you want to perform these actions?
Terraform will perform the actions described above.
Only 'yes' will be accepted to approve.
Enter a value:
Once the managed Postgres, Redis and Object Storage (Spaces) are provisioned, Harbor will be deployed on the DOKS cluster inside the harbor namespace.
You can confirm Harbor has been successfully deployed using kubectl:
kubectl -n harbor get deployments
NAME                          READY   UP-TO-DATE   AVAILABLE   AGE
harbor-chartmuseum     2/2     2            2           3m36s
harbor-core            2/2     2            2           3m36s
harbor-jobservice      2/2     2            2           3m36s
harbor-nginx           1/1     1            1           3m36s
harbor-notary-server   2/2     2            2           3m36s
harbor-notary-signer   2/2     2            2           3m36s
harbor-portal          2/2     2            2           3m36s
harbor-registry        2/2     2            2           3m36s
You can also view the provisioned resources via the DigitalOcean console:
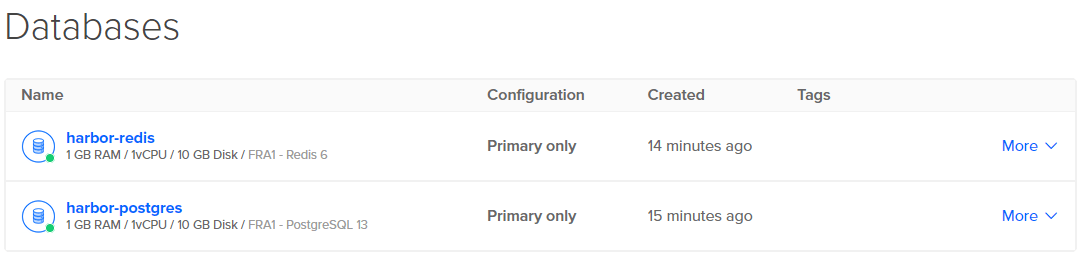 Postgres & Redis Databases provisioned by the Harbor Terraform module.
 Spaces bucket provisioned by the Harbor Terraform module.
Step 4 - Accessing the Harbor Registry Web UI
The module’s default configuration exposes Harbor via a Kubernetes service with an assigned Cluster IP. kubectl’s port-forward feature can be used to forward the Harbor service locally to provide access to the UI.
kubectl -n harbor port-forward svc/harbor 8443:443You can now open a browser, navigate to https://127.0.0.1:8443/ and login using the default username ‘admin’ and password ‘Harbor12345’:
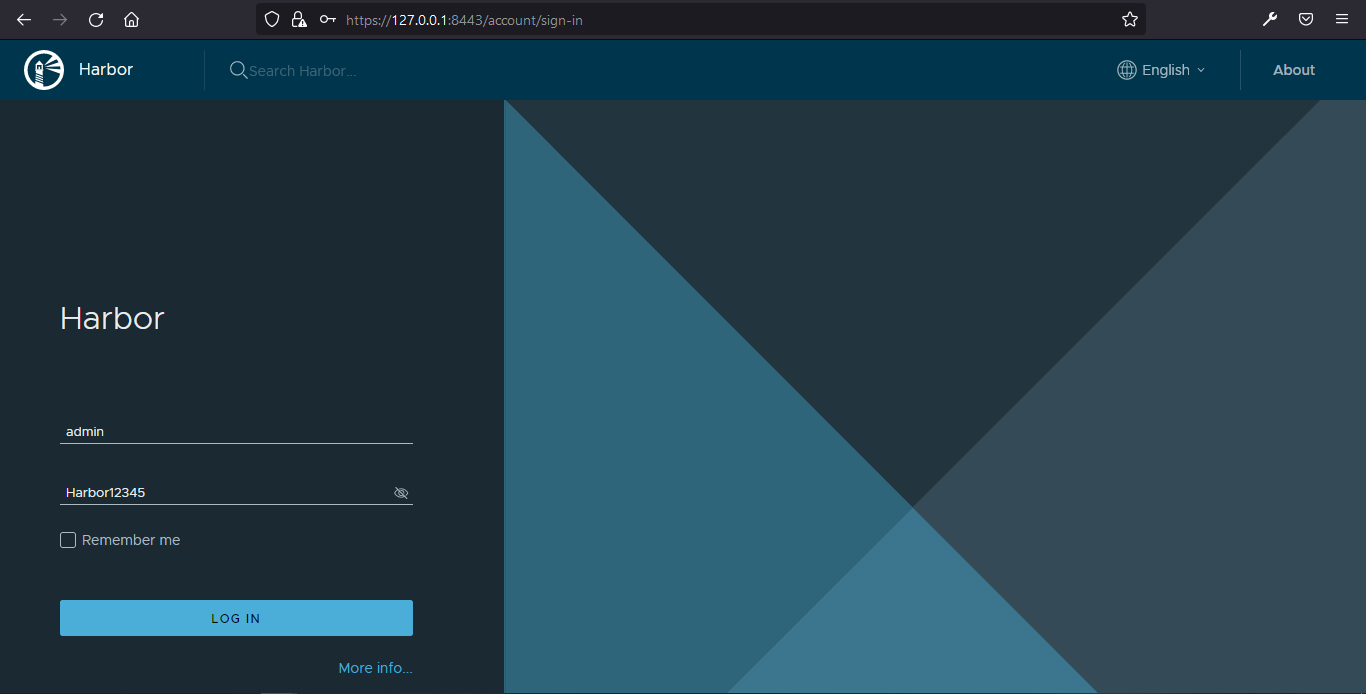 Harbor User Interface (UI) Login.
Step 5 - Configuring the Docker Client to Access Harbor
By default Docker does not trust registries with self-signed certificates1, so the Docker daemon needs to be configured to trust Harbor’s CA certificate.
First, retrieve the CA cert from your Harbor deployment. You can either use kubectl to retrieve it via the secret associated with Harbor’s nginx pod:
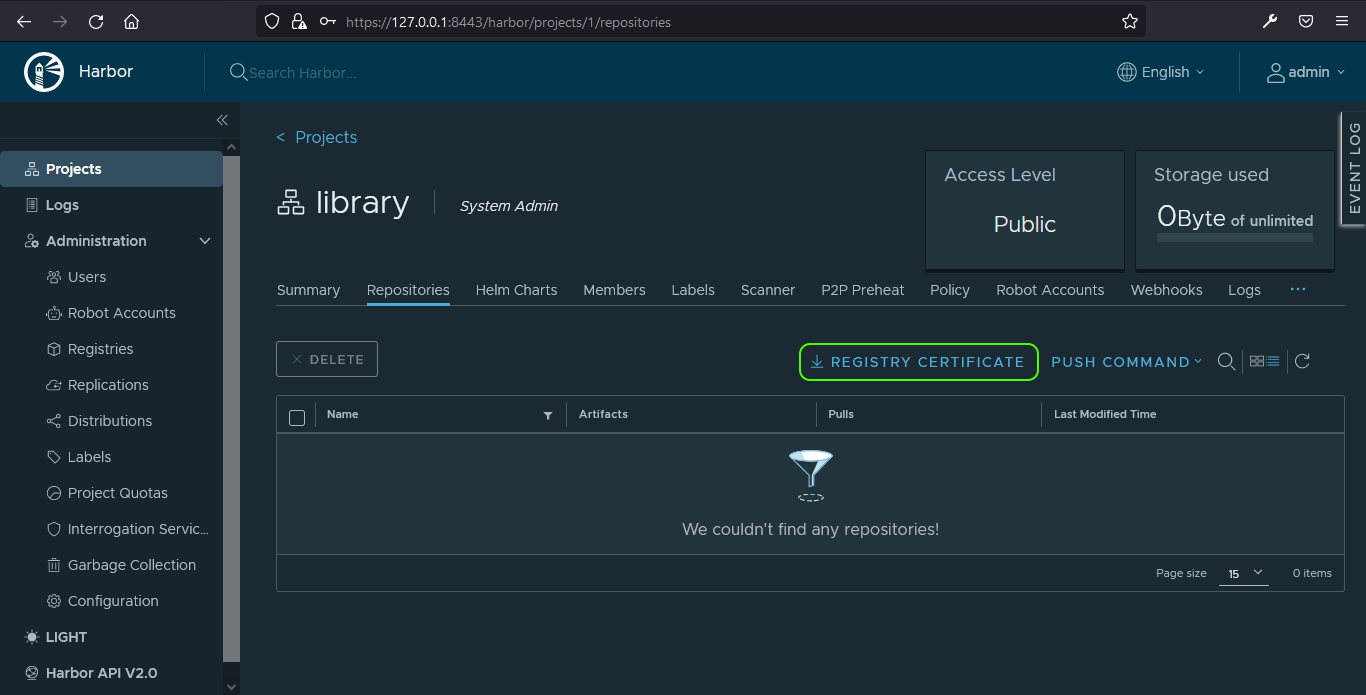
kubectl -n harbor get secrets harbor-nginx -o jsonpath="{.data['ca\.crt']}" | base64 -d > harbor-ca.crtOr download it via the Harbor UI. Having logged in, click on the default project, ‘library’ then click the ‘REGISTRY CERTIFICATE’ button to download the CA cert:
Now, using the Harbor registry’s domain name, create a directory for the certificate on the machine you plan to run docker login from:
harbor.localis the default domain name configured by the module for the Harbor Registry
mkdir -p /etc/docker/certs.d/harbor.local
copy the harbor-ca.crt to this location:
cp harbor-ca.crt /etc/docker/certs.d/harbor.local/ca.crt
You can now login to Harbor using the docker login command:
docker login -u admin -p Harbor12345 harbor.local
Step 6 - Push an Image to the Harbor Registry
Having logged in to Harbor, use the following commands to pull an nginx image from Docker Hub and then push it to the Harbor registry:
# Pull an image from Docker Hub
$ docker pull nginx

# Tag the image, so it's ready to be pushed
$ docker tag nginx:latest harbor.local/library/nginx:latest

# Push the image to the registry
$ docker push harbor.local/library/nginx:latest
You can see in Harbor’s UI that the image was successfully pushed:
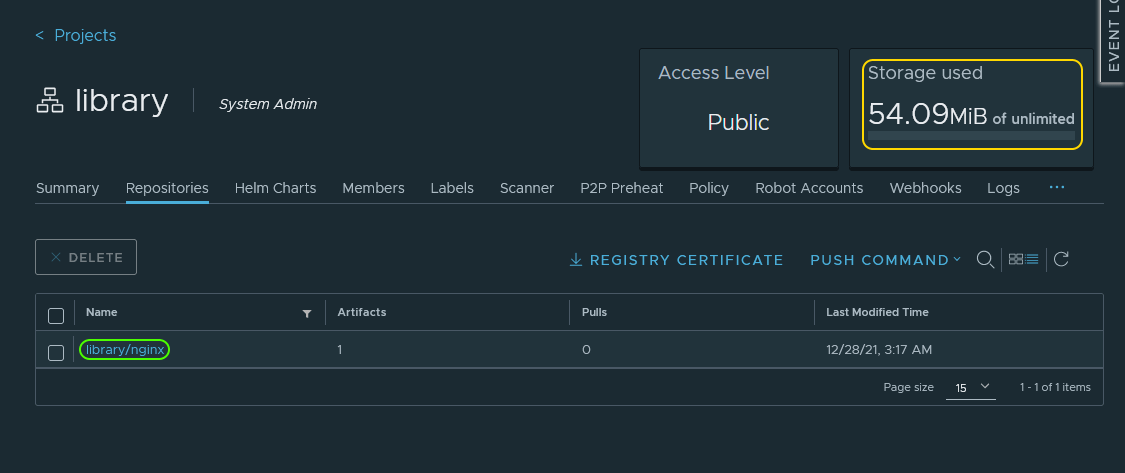
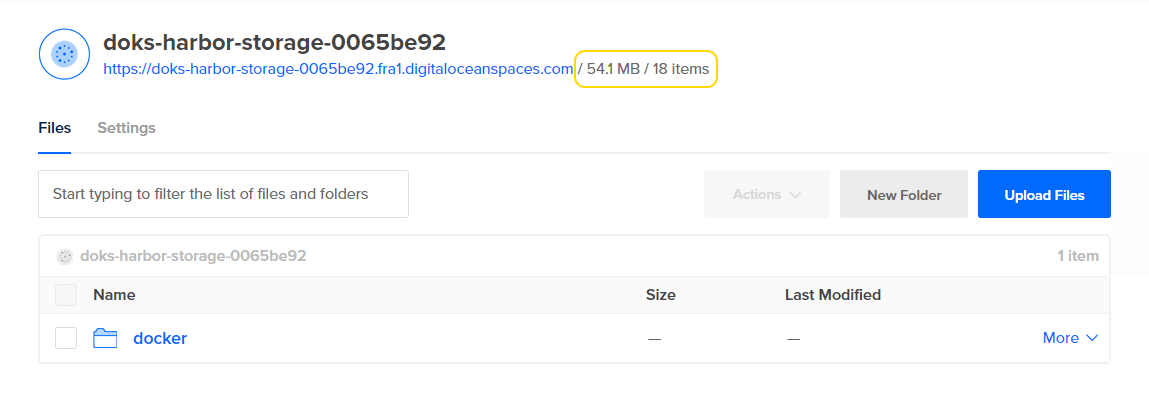
And if you check DigitalOcean’s dashboard you can see that the provisioned Spaces bucket is being utilised:
Caveats & Mitigations
While exploring the configuration necessary for this high availability deployment I did encounter a couple of minor issues.
Three core components utilised by a Harbor for storage in a HA environment are PostgreSQL, Redis and PVCs or Object Storage.
PVCs vs Object Storage

Harbor requires ReadWriteMany (RWX) access mode if PVCs are to be used for image, chart and job log storage2. Currently, DigitalOcean’s CSI driver (which leverages DO’s block storage) does not support RWX, so a dedicated Spaces (DigitalOcean’s S3 API compatible object storage product) bucket is configured instead.
Connecting to Managed Redis

Redis wasn’t initially designed to be consumed outside a secure private network, so like most cloud providers DigitalOcean’s managed Redis product is accessible only via a secure connection. And since Harbor does not (currently) support secure connections to Redis, the module deploys a lightweight socat container as a DaemonSet to proxy the connection between Harbor and the managed Redis cluster.
Summary
So you now have a highly available Harbor Registry running on a DigitalOcean Kubernetes cluster. In the next tutorial, I’ll cover how to combine this module with another that deploys the Traefik proxy and a valid TLS cert. This enables external access to Harbor without the need to re-configure your Docker daemon.
As always if you spot any mistakes in this guide or have any suggestions for improvement please do comment below.