KEMP’s Edge Security Pack (ESP) useful for publishing services like Exchange Client Access Servers features ‘Forms Based’ authentication. When enabled this option presents the client with a form to enter their credentials for authentication. The default form(s) are customisable, allowing you to create your own custom/corporate branded authentication forms.
Default Forms
There are 7 default forms available:
- Blank
- Dual Factor Authentication
- Exchange
- Français Canadien - Blank
- Français Canadien - Exchange
- Português do Brasil - Blank
- Português do Brasil - Exchange
 Default Blank Authentication Form | KEMP LoadMaster ESP
Basic Customisation
The default forms consist of basic HTML. It’s possible to customise the section immediately above the radio buttons via the ESP SSO Greeting Message option. This option accepts either plain text or HTML (with the exception of accents (`) or single quotes (’’)).
Instructions
From the main menu, select Virtual Services and View/Modify Services.
Click Modify on the relevant Virtual Service.
Expand the ESP Options section.
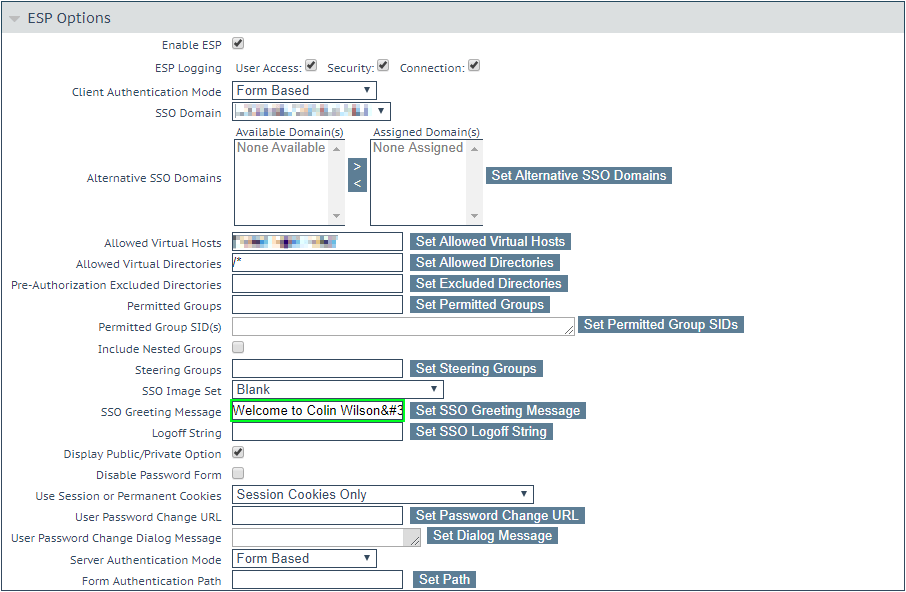 SSO Greeting Message in Virtual Server ESP Options | KEMP LoadMaster ESP
Ensure that ESP is enabled.
Ensure that the Client Authentication mode is set to Form Based.
Enter the text that you would like to appear on the form within the SSO Greeting Message text box.
Click the Set SSO Greeting Message button.
Example SSO Greeting Message Settings & Screenshots
| Plain Text | HTML | |
|---|---|---|
| SSO Greeting Message Setting | | |
| Screenshot |
Basic Image Set Structure & Customisation
KEMPs SSO Image Set customisation option allows you to create and upload your own customised basic login forms by amending a few image files.
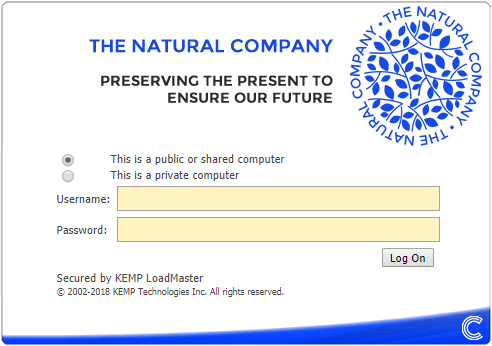
Basic Custom SSO Image Set | with customised header and footer image files
Image Set Structure
First download the required Image Set templates. You can download these from here.
The image set contains a .tar file structured as follows:
The easiest route to creating a custom image set is to make a duplicate of the existing <IMAGESETNAME> directory, rename it appropriately (e.g. ‘Colin Wilson v1.0’) and then amend the necessary files.
Each custom image set requires a minimum of 3 files to function:
- MANIFEST
- lm_initial.html
- lm_logout.html
The MANIFEST file contains a list of all the files in the image set to be loaded when the form is requested by a client:
Any files present inside your image set sub directory not listed in the MANIFEST file will not be loaded when the form is requested.
IMPORTANT: The last line of the MANIFEST file must be a new/blank line for the image set to function properly
There is also an additional (but not mandatory) file named INFO which allows you to insert a description of your image set that will be displayed in the KEMP Load Balancer admin WUI once uploaded. This is useful for including author and version information with your image set.
Basic Customisation
For a basic custom image set we need only update a couple of files.
espblank.gif- The forms header imageespbottom.gifThe forms footer image
That’s it! Once you’re happy with your updates, save them to your named imageset subdirectory (if you’ve renamed the default files, remember to list them in the MANIFEST).
Your final image set structure should resemble the following:
Using a compression application (e.g.7-Zip), tar the parent imagesets directory (NOT your custom image set subdirectory) to create the imagesets.tar file for uploading.
Uploading your Image Set to the KEMP Load Balancer
To upload your custom SSO image set to the LoadMaster, follow the steps below in the LoadMaster WUI:
In the main menu, select Virtual Services and Manage SSO.
Click Choose File.
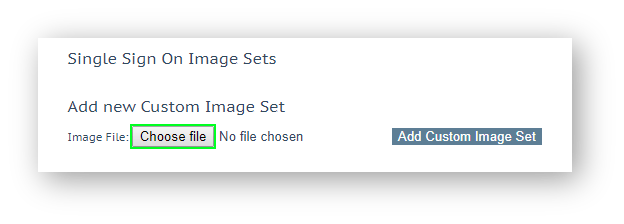
Choose Custom SSO Image Set | KEMP LoadMaster ESPBrowse to and select the .tar file.
Click Add Custom Image Set.
After adding the file, the supplied image set(s) is/are listed on this page.
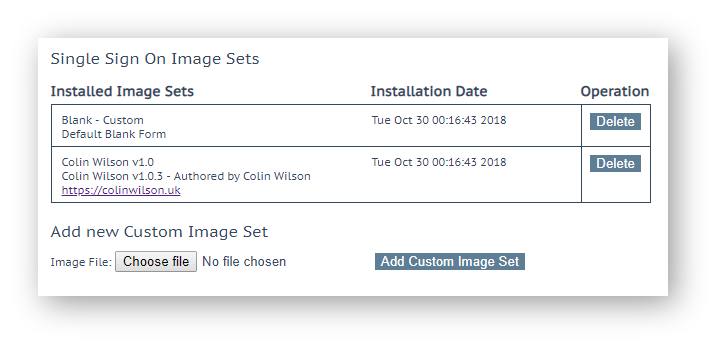
Uploaded Custom SSO Image Sets | My Image Set names are ‘Blank - Custom’ and ‘Colin Wilson v1.0’
They’ll also be available to select in the SSO Image Set drop-down list in the ESP Options section of the Virtual Service modify screen.
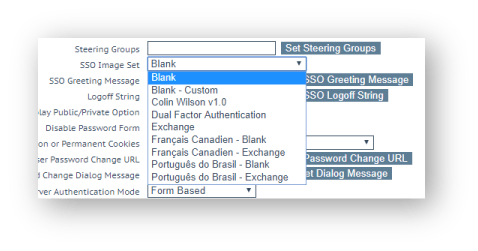
Select Custom SSO Image Set | Choose your custom image set
Advanced Image Set Customisation
It’s also possible make more extensive modifications to create a highly customised image set.
Providing you retain key sections of HTML code in the lm_initial.html file and ensure the lm_sso.js file is included in the image set, you can update/change almost everything else to your liking.
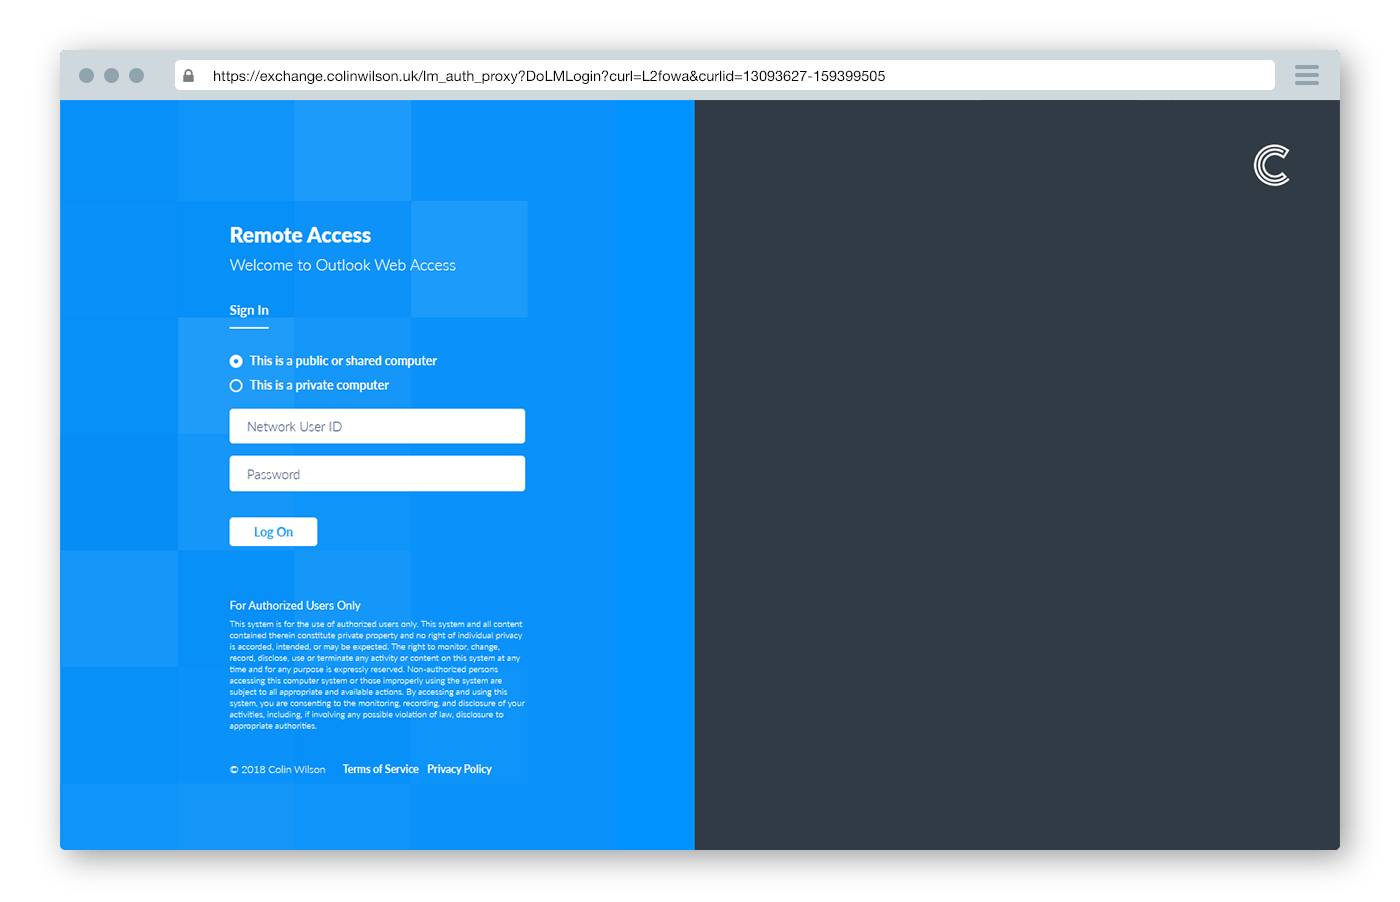
Using bootstrap, custom CSS and my own images, I modified the lm_initial.html & lm_logout.html files to create a responsive, clean, mobile ready, custom image set for use with accessing Microsoft Outlook Web App on Exchange 2016.
| Desktop | Mobile |
|---|---|
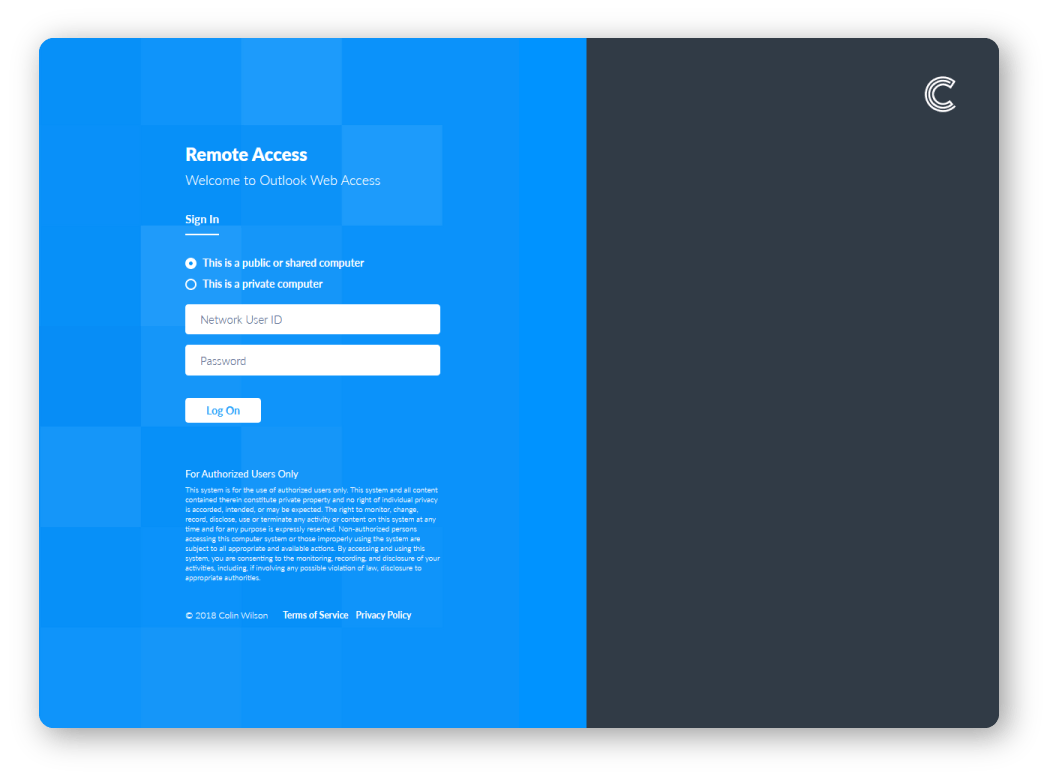 | 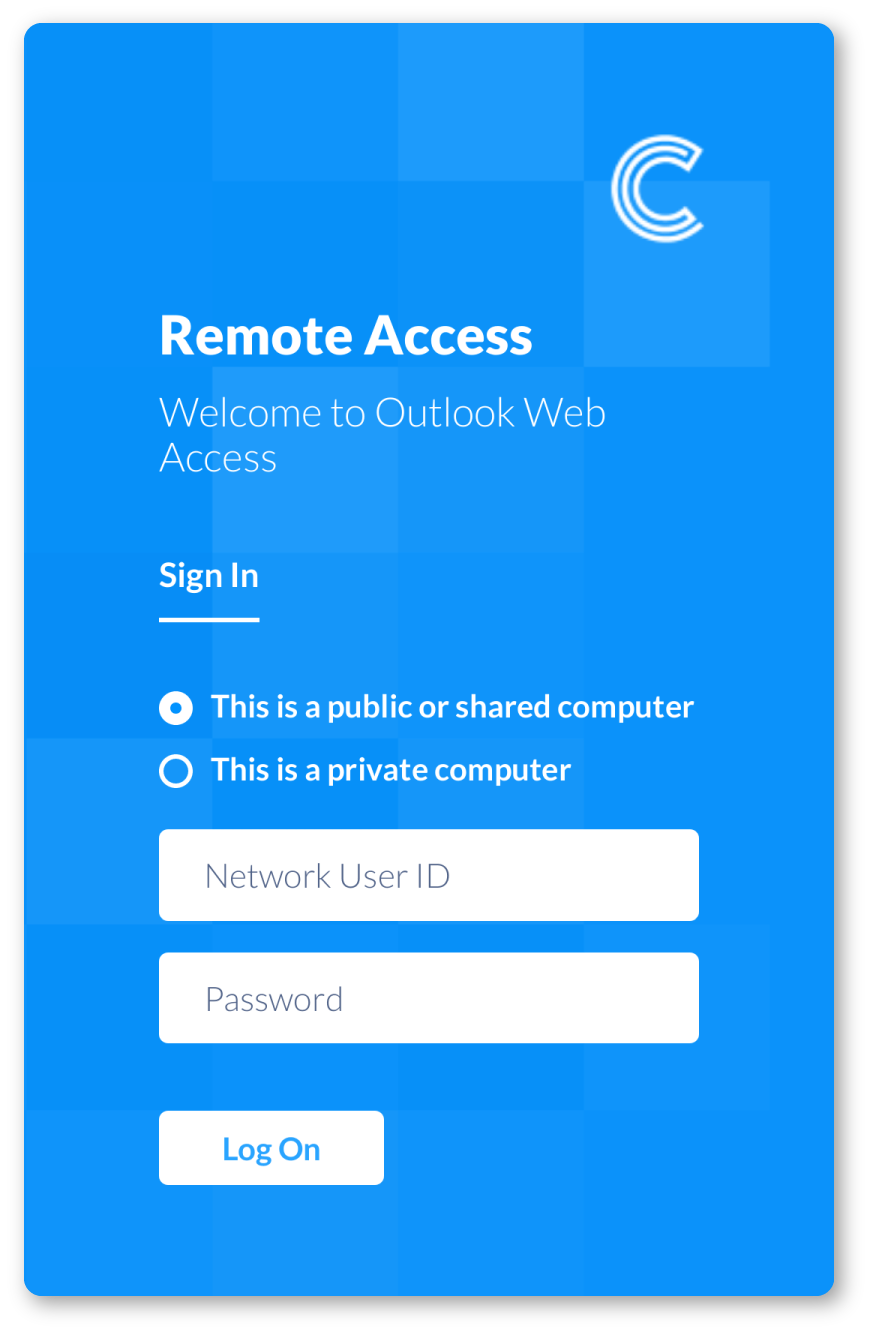 |
A few key guidelines when creating an ‘advanced’ image set:
You have two options when including links. You can include links to external assets (e.g. a CDN) or sites as normal. Alternatively you can include links to assets contained inside your image set. If doing so you’ll need to include the load balancers
'lm_auth_proxy'script URL in the hyper-link. e.g.‘
/lm_auth_proxy?LMimage=custom-image.png’For example. A stylesheet link to
bootstrap.min.csslocated inside your image set subdirectory would be placed in the<head>section of thelm_initital.htmlfile. It would look like this:<link href="/lm_auth_proxy?LMimage=bootstrap.min.css" type="text/css" rel="stylesheet">Retain the error script section in
lm_initial.html. You may customise the error messages contained within to suit your needs:You must include KEMP’s JavaScript file
lm_sso.jsso the form can function:Also include the
<noscript>tag section to warn users that JavaScript is required in order for the form to work:Don’t alter anything in the opening
<form>tag (such asaction,method,idoronSubmit). The LoadMaster will not be able to process client login requests otherwise:There are numerous
idattributes dotted throughout thelm_initial.htmlfile. It’s best not to remove any of these. Doing so will result in a failure of a corresponding action (e.g removingid="password"will prevent the password input field being successfully submitted and an authentication failure).
Everything else inside the image set is open to customisation. The only limit is that of your imagination (and skill).
Here’s a link to the repo of the demo image sets I made - [WIP] (feel free to fork / download / make pull requests / open issues):
![]() https://github.com/colinwilson/kemp-esp-custom-forms
https://github.com/colinwilson/kemp-esp-custom-forms
References
KEMP Edge Security Pack Documentations
KEMP Custom Authentication Form Documentation