Introduction
Many cloud providers now offer some form of managed Kubernetes. This is great for anyone wishing to offload the often time-consuming (and error-prone) task of setting up and maintaining a self-hosted cluster. However, even with an array of configuration options, managed cloud offerings can struggle to meet the often specific requirements of a developer or organisation that a custom configured cluster can. Automating the process using Terraform goes a long way to mitigating the concerns a self-managed cluster presents while still retaining the flexibility of one.
What’s the goal of this tutorial?
This tutorial covers the automated deployment of a High Availability K3s cluster on the DigitalOcean (DO) platform using a Terraform module. The module enables a fully functioning (production-ready) K3s cluster up and running in less than 10 minutes.
DigitalOcean as the cloud platform of choice for the module was mostly arbitrary. Like a lot of cloud providers, DigitalOcean offers block storage, managed databases, virtual private cloud networks and dedicated load balancers. These are some of the base components provisioned by the Terraform module in this tutorial. The module itself could be forked to accommodate alternative Terraform cloud providers such as AWS, Google or Azure.
See https://github.com/aigisuk/terraform-digitalocean-ha-k3s for more detailed information about the module and its use.
What is K3s? And why use it instead of Kubernetes?
K3s is a fully conformant production-ready lightweight Kubernetes distribution
K3s is a lightweight distribution of Kubernetes. It bundles many Kubernetes technologies into a single binary. This simplifies the deployment, operation and maintenance of a Kubernetes cluster while still being a fully conformant and secure distribution. These features make K3s a great choice for development (or production) environments, especially in resource-constrained edge deployments.
Prerequisites
- DigitalOcean Cloud Account (Referral Link) & Personal Access Token (with Read/Write permissions)
- An SSH Key pair
- Terraform ≥ v0.13
- Basic knowledge of Kubernetes & Terraform
Step 1 - Clone the Example Repository
Clone the example Terraform configuration repository https://github.com/colinwilson/example-terraform-modules/tree/terraform-digitalocean-ha-k3s
Alternatively, manually create the above file structure by copying the following code snippets. (click to expand)
Copy and paste the following code to your main.tf file:
Copy and paste the following code to your outputs.tf file:
Copy and paste the following code to your variables.tf file:
Step 2 - Set the Required Input Variables
The default module configuration requires only two inputs. Replace the example values in the terraform.tfvars file with your own DigitalOcean Personal Access Token and SSH Public Key:
Step 3 - Initialize the Terraform Configuration & Provision the K3s Cluster
Switch to your example-terraform-modules directory and initialize your configuration by running terraform init.
Terraform will proceed to download the required provider plugins.
Example 'terraform init' OUTPUT. (click to expand)
Now run terraform apply to apply your configuration and deploy the K3s cluster.
Example 'terraform apply' OUTPUT. (click to expand)
Respond to the prompt with yes to apply the changes and continue.
Terraform will now start provisioning the K3s Cluster resources on DigitalOcean. Once complete (should take under 10 minutes) the command output presents a summary of the cluster components and configuration e.g. IP addresses and node names.
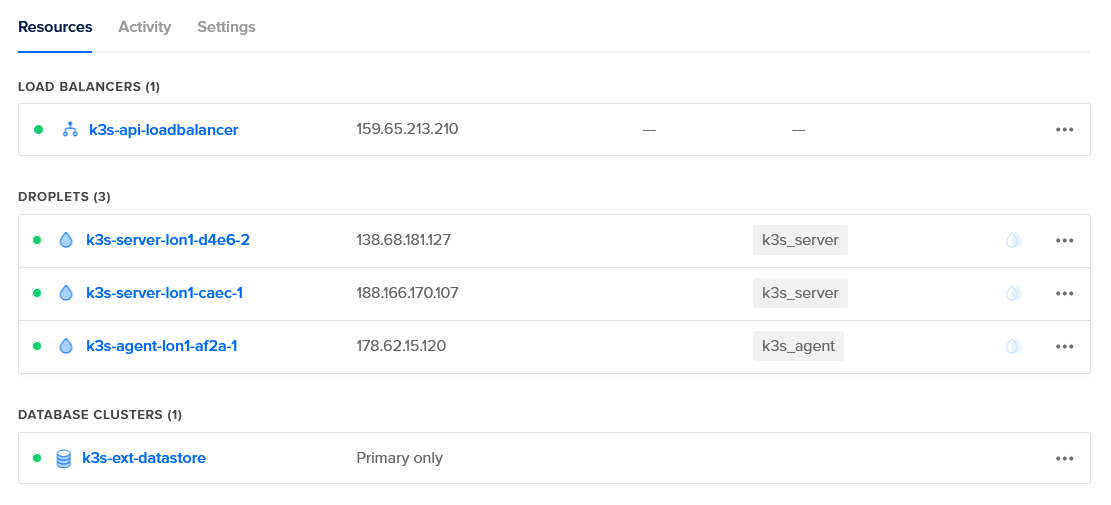
By default, the module provisions 2 server nodes, 1 agent node, a Postgres database to serve as the cluster datastore and a load balancer to proxy API requests to the server nodes.
 Deployed K3s resources viewed via the DigitalOcean dashboard.
Example configuration OUTPUT. (click to expand)
This info is needed for direct access to the cluster nodes and is useful if you’re provisioning the cluster in conjunction with existing resources or as inputs for dependant modules in a configuration.
Step 4 - Accessing the Cluster Externally with kubectl
Now the cluster is setup you’ll most likely want to manage it using kubectl from outside. This can be achieved by copying the clusters kubeconfig to a local machine with kubectl installed.
SSH into one of the provisioned server nodes via its corresponding public IP address (from the configuration output). Copy the /etc/rancher/k3s/k3s.yaml file and save it to the kubeconfig location (~/.kube/config) on your local machine. Alternatively use the scp (secure copy) command to copy the config to your local machine.
Replace 127.0.0.1 with the public IP address of the provisioned API Proxy Load Balancer (this is the value for the api_server_ip key from the cluster_summary output, i.e. 198.51.100.10 using the example output above).
You can now use kubectl to check the cluster is functioning normally. Run kubectl get nodes to view the status and information of the cluster nodes:
Status Ready indicates the cluster nodes are healthy and ready for application deployments (pods).
Step 5. Clean up
You can destroy the cluster by running terraform destroy. Respond to the prompt with yes and Terraform will destroy all the resources provisioned during the terraform apply process.
N.B. Additional billable DO resources provisioned by way of deployed cluster applications are not managed by Terraform and will therefore persist even after applying
terraform destroy. Failing to destroy resources provisioned outside the module could result in charges from DigitalOcean.
Example 'terraform destroy' OUTPUT. (click to expand)
Summary
Throughout this guide, you configured and provisioned a K3s cluster on the DigitalOcean platform using a Terraform module. Then copied its kubeconfig to a local machine for access and management and checked it was functioning properly using kubectl.
The additional features and options the module in this tutorial provides are extensive and will be covered in more detail in future articles.
